- 当前位置:首页 > 宇宙主宰 > 7 Ways to Screenshot in Windows 10
7 Ways to Screenshot in Windows 10
发布时间:2025-06-14 16:16:58 来源:脚踏实地网 作者:落在眼睛里的最后一滴雨
- Day 1: Get Rid of Windows 10 Ads, Office Offers and Other Annoyances
- Day 2: 7 Free Apps to Install on a New Windows PC
- Day 3: Take advantage of Xbox Streaming and Game DVR in Windows 10
- Day 4: 7 Ways to Screenshot in Windows 10 + Windows 10's God Mode
- Day 5: Tweaking Windows 10 Privacy Settings
A few of you clicking on 关键字2this article are probably thinking: "isn't it easy to screenshot in Windows 10? You just press the print screen button and a screenshot is saved to the clipboard!" And you'd be correct; simply hitting the print screen button on your keyboard is the easiest way to capture a screenshot.
But Windows provides several other ways to screenshot, many of which are better options than simply mashing the print screen button, depending on your requirements. So below we've listed seven alternate methods of screenshotting that may come in handy in day to day life.
Alt + Print Screen
This simple keyboard combination is one that we use every day. By simultaneously hitting Alt and Print Screen, instead of capturing your entire screen, Windows 10 will only capture the active window. For those with large displays or multiple monitors with loads of windows open, this is the perfect way to capture only the most important stuff on the screen.
Like when you press just the Print Screen key by itself, Alt + Print Screen saves the image to your clipboard. To access the image, you'll need to paste it into an app like Paint.
Win + Print Screen
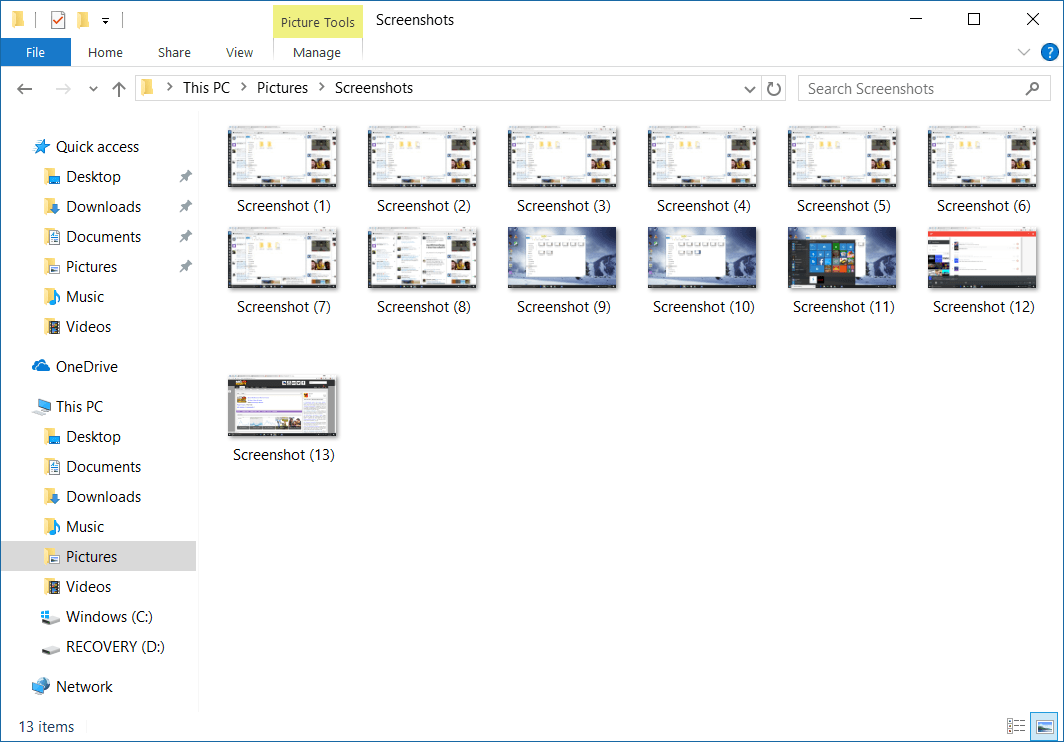
This is another extremely handy keyboard combination you should put in your daily workflow. Hitting Win + Print Screen captures a screenshot of the entire screen and saves it directly to your drive. The photos are saved in the Pictures library, in the Screenshots folder, as PNG files.
This is the best tool to use if you want an immediate image file created from your screenshot. It's quicker and easier than hitting Print Screen and then pasting the image into an image processing app like Paint. Unfortunately, you can't hit Alt + Win + Print Screen to save an image of the active window.
Win + H
If you use Universal Windows apps often, you may find the Win + H keyboard shortcut useful. Hitting these keys simultaneously will take a screenshot of your active app and bring up a sharing panel, allowing you to easily insert and share this screenshot in other apps.
For desktop users, it's not as handy as the two shortcuts above, but it is another way to screenshot in Windows 10.
Windows + Volume Down
The final set of shortcuts here is one for tablet users. It's simple: hit the Windows button (or capacitive touch logo) in conjunction with the volume down button, and it will take a screenshot of your entire screen and save it to the Screenshot folder. Think of it as a hardware button version of Win + Print Screen.
Snipping Tool
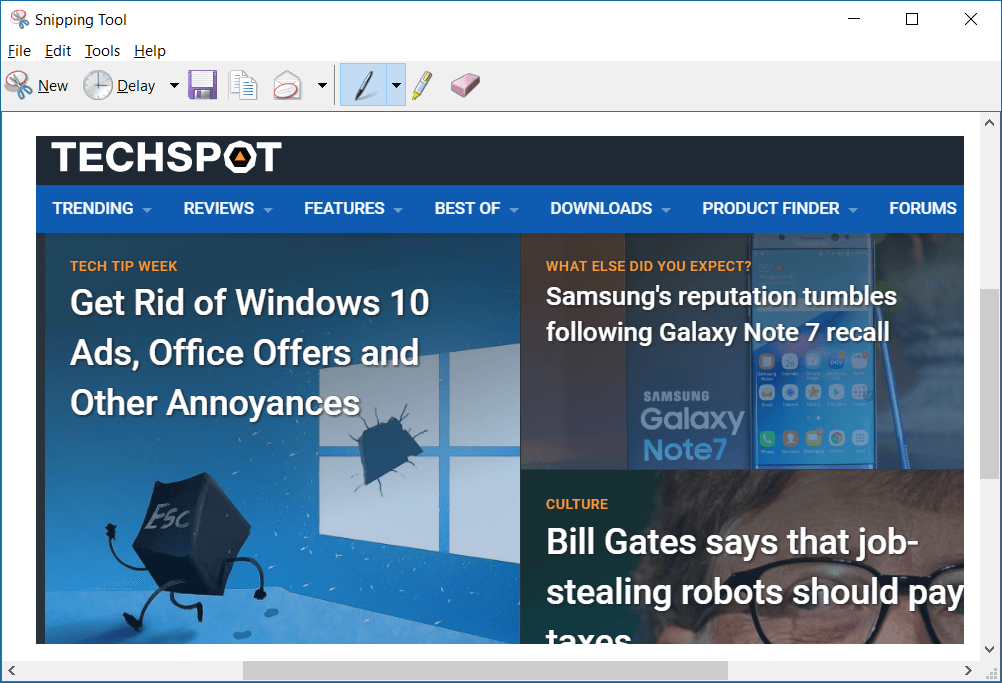
The Snipping Tool is one of several software solutions provided in Windows. The app gives you greater control over what exactly is captured in your screenshot, by allowing you to draw rectangles or free-form shapes around anything on your screen. It also has a delay function so you can capture the perfect moment. After the Snipping Tool captures the selected area of your screen, you can annotate and highlight whatever you like using the built-in tools. It's then easy to save the screenshot as an image to your drive.
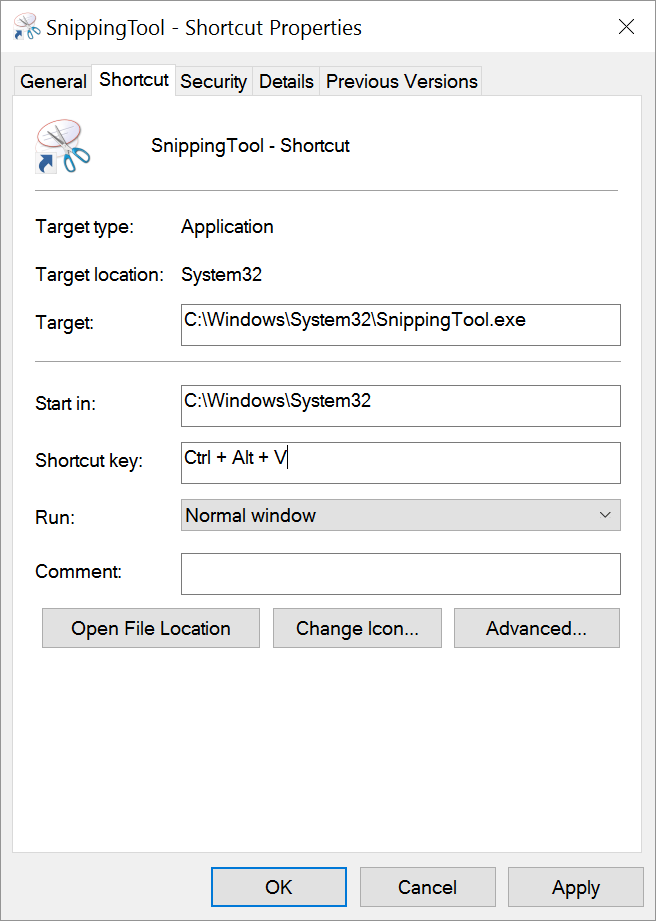
If you take screenshots often, creating a hotkey (keyboard shortcut) to open the Snipping Tool comes super handy. To do that, open the Windows Explorer and browse to the Windows / System32 folder. Look for SnippingTool.exe, right-click on it and select Create Shortcut. You can place this shortcut somewhere hidden, in your Documents or Downloads folder. Then right-click on this shortcut and select Properties. In the field Shortcut Key, you can set your shortcut. I personally like setting my screenshot tool to "Win Key + Shift + S" but you could certainly go with something as easy as F7.
There are also third-party tools that provide more functionality, but for the most part the Snipping Tool does everything you'd want. And it's already included with Windows 10.
Windows Inking Tools
If you have a device that supports stylus input through Windows Ink, there are some additional ways to capture a screenshot in Windows 10. One way involves opening the Ink Workspace, which is available by tapping the pen icon in the taskbar, and then clicking on 'screen sketch'. From here, a full screenshot is captured and opened in a window that allows annotating.
Another way to achieve the same outcome is to double tap the eraser button on your stylus, provided your stylus supports this feature. The Surface Pen included with some Microsoft Surface products is one such stylus that has this functionality.
Game DVR (in Games)
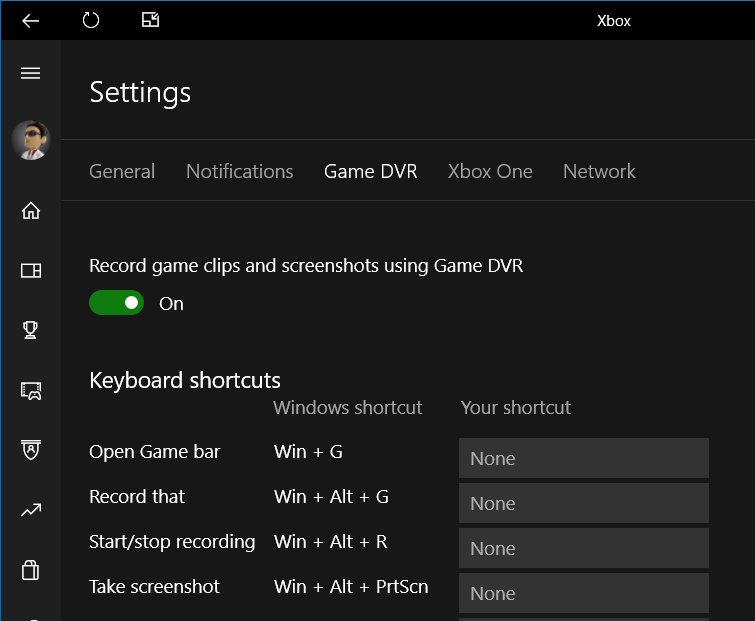
There is an additional screenshot utility provided as part of Windows 10's Game Bar and Game DVR. When the Game DVR is activated and enabled, you'll be able to screenshot in games by hitting Win + Alt + Print Screen (or a shortcut of your choice). You'll get a notification on screen to let you know it was successful, and images are saved in the Captures folder of your Videos library.
To turn on the Game DVR's screenshot feature, open the Xbox app, head to the Game DVR tab of the settings menu, and check the box that says "record game clips and screenshots using Game DVR". This screenshot feature will only work in games, and the Xbox app does a reasonable job of detecting what is and isn't a game. In the event a game is not detected, open the Game Bar using Win + G then check the "yes, this is a game" box.
5 days, 5 killer tech tips is a TechSpot monthly feature
On the third week of every month, we'll publish 5 killer tech tips, one for each day of the week for a given app, service, or platform.
This week we are uncovering great Windows 10 usability tips and tricks.
相关文章
- Copyright © 2025 Powered by 7 Ways to Screenshot in Windows 10,脚踏实地网 sitemap